DIY Vent Hood Cover: Step-by-Step Guide to a Stylish Kitchen Upgrade
Introduction
Welcome to our DIY vent hood cover guide! Are you looking to add a touch of style and elegance to your kitchen? Building your own vent hood cover can be a budget-friendly way to enhance the look of your cooking space. In this comprehensive guide, we’ll walk you through the process step by step, helping you create a custom vent hood cover that suits your kitchen perfectly.
With a few materials, tools, and a bit of creativity, you can transform your kitchen and give it a personalized touch that reflects your style. Let’s dive in and upgrade your kitchen with a unique vent hood cover!
Throughout this guide, we’ll be focusing on the keyword “Vent Hood Cover,” ensuring that you grasp every aspect of this DIY project. Let’s get started!
If you’re ready to roll up your sleeves and get creative, let’s begin the journey of crafting your very own vent hood cover.
Materials/Tools Required
Before you embark on your DIY vent hood cover project, it’s essential to gather all the necessary materials and tools. Here’s what you’ll need:
1. Plywood sheets for the frame
2. Decorative wood trim for embellishments
3. Nails, screws, and a hammer
4. Wood glue for securing the pieces together
5. Sandpaper for a smooth finish
6. Paint or stain for adding color
7. Saw for cutting the wood to size
Make sure you have all these items ready before you begin constructing your vent hood cover.
Step-by-Step Instructions
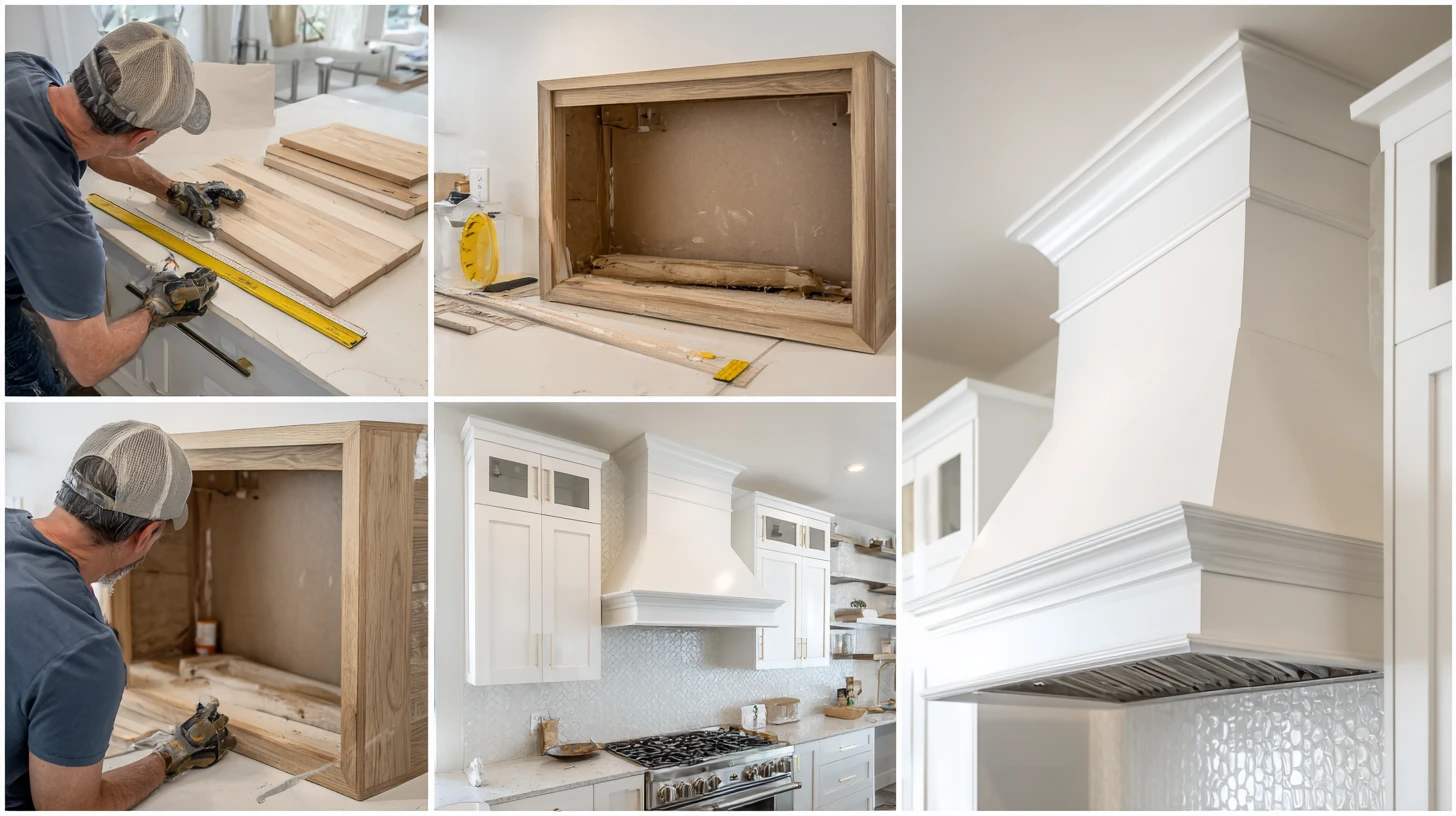
Creating a vent hood cover for your kitchen involves several steps. Let’s break down the process into clear, actionable steps:
1. Measure the dimensions of your existing vent hood to determine the size of the cover.
2. Cut the plywood sheets to the measured size using a saw, ensuring precise cuts.
3. Assemble the plywood pieces to form the frame of the vent hood cover, using wood glue and nails for stability.
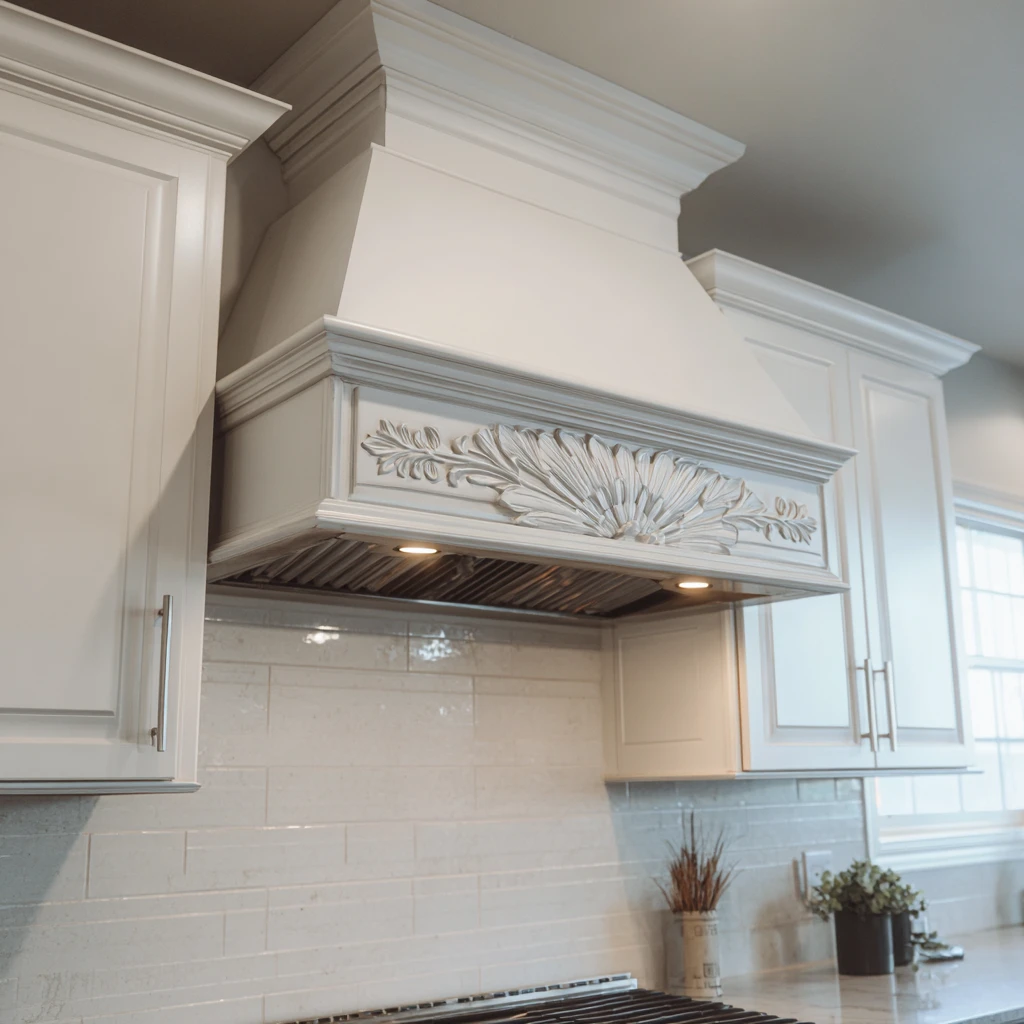
4. Add decorative wood trim to the frame to enhance the aesthetics of the cover.
5. Sand the surfaces to achieve a smooth finish, removing any rough edges.
6. Paint or stain the vent hood cover in the color of your choice, allowing it to dry completely.
7. Once the cover is dry, install it over your existing vent hood to complete the transformation.
Variations/Alternative Approaches
While the above steps provide a basic guide to creating a vent hood cover, there are various ways to personalize your project:
1. Experiment with different wood finishes to match your kitchen decor.
2. Incorporate metal accents for an industrial look.
3. Add lighting elements to highlight your vent hood cover as a focal point in the kitchen.
Feel free to explore alternative approaches to designing your vent hood cover to make it truly unique.
Common Mistakes to Avoid
As you work on your DIY vent hood cover, keep an eye out for these common mistakes:
1. Not taking accurate measurements, leading to ill-fitting covers.
2. Using inadequate adhesive, resulting in unstable constructions.
3. Rushing the painting process, causing uneven finishes.
By being mindful of these mistakes, you can ensure a smooth and successful vent hood cover project.
Tips and Tricks
Here are some additional tips to enhance your vent hood cover project:
1. Seal the wood with a protective coating to increase durability.
2. Use clamps to hold pieces together while the glue dries for a secure bond.
3. Experiment with different paint techniques for a unique finish.
Incorporating these tips and tricks will elevate the quality of your DIY vent hood cover.
Conclusion
Congratulations on completing your DIY vent hood cover! By following our step-by-step guide and incorporating your creativity, you’ve successfully upgraded your kitchen with a stylish and personalized touch. Your new vent hood cover not only enhances the look of your kitchen but also reflects your unique taste and craftsmanship.
Remember, with a little effort and imagination, you can turn simple materials into a stunning focal point in your home. Enjoy your newly revamped kitchen space!
FAQs
Q: Can I customize the design of my vent hood cover?
A: Absolutely! Feel free to experiment with different shapes, colors, and embellishments to create a vent hood cover that matches your style.
Q: How can I ensure proper ventilation with a DIY vent hood cover?
A: Make sure to leave adequate space for airflow and follow the installation instructions for your vent hood to maintain proper ventilation.
Q: Is it necessary to seal the wood for outdoor vent hood covers?
A: Yes, sealing the wood will protect it from the elements and prolong the life of your outdoor vent hood cover.
Have more questions? Feel free to reach out for further guidance on your vent hood cover project!